
Lesson
Build strength with triangles.
ECreative EngineeringUse shapes to help structures hold their form.
Structural engineering · Explore how triangular bracing helps a frame resist changing shape.
Question
Why do so many bridges and roof frames contain triangles?
 Why do so many bridges and roof frames contain triangles?
Answer
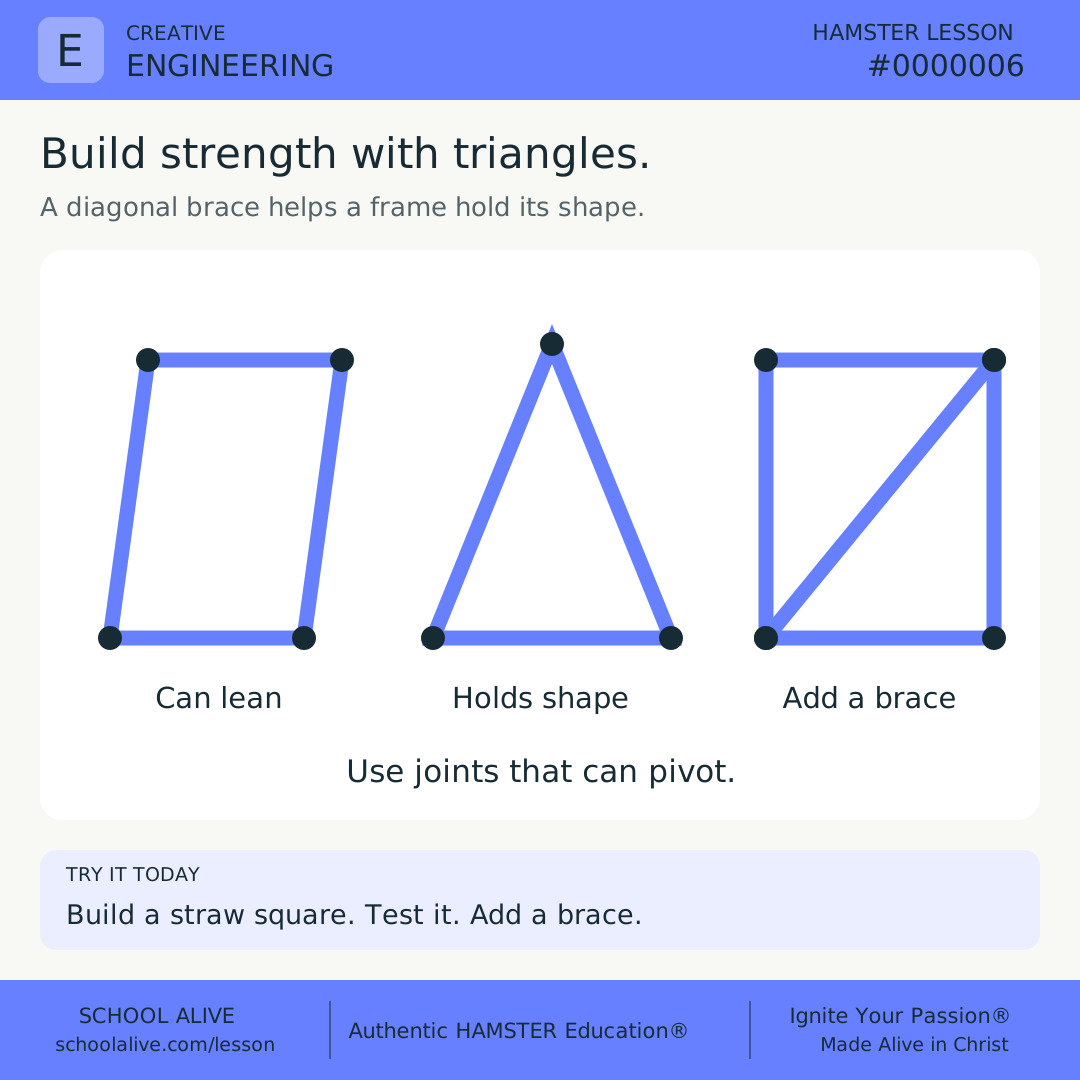
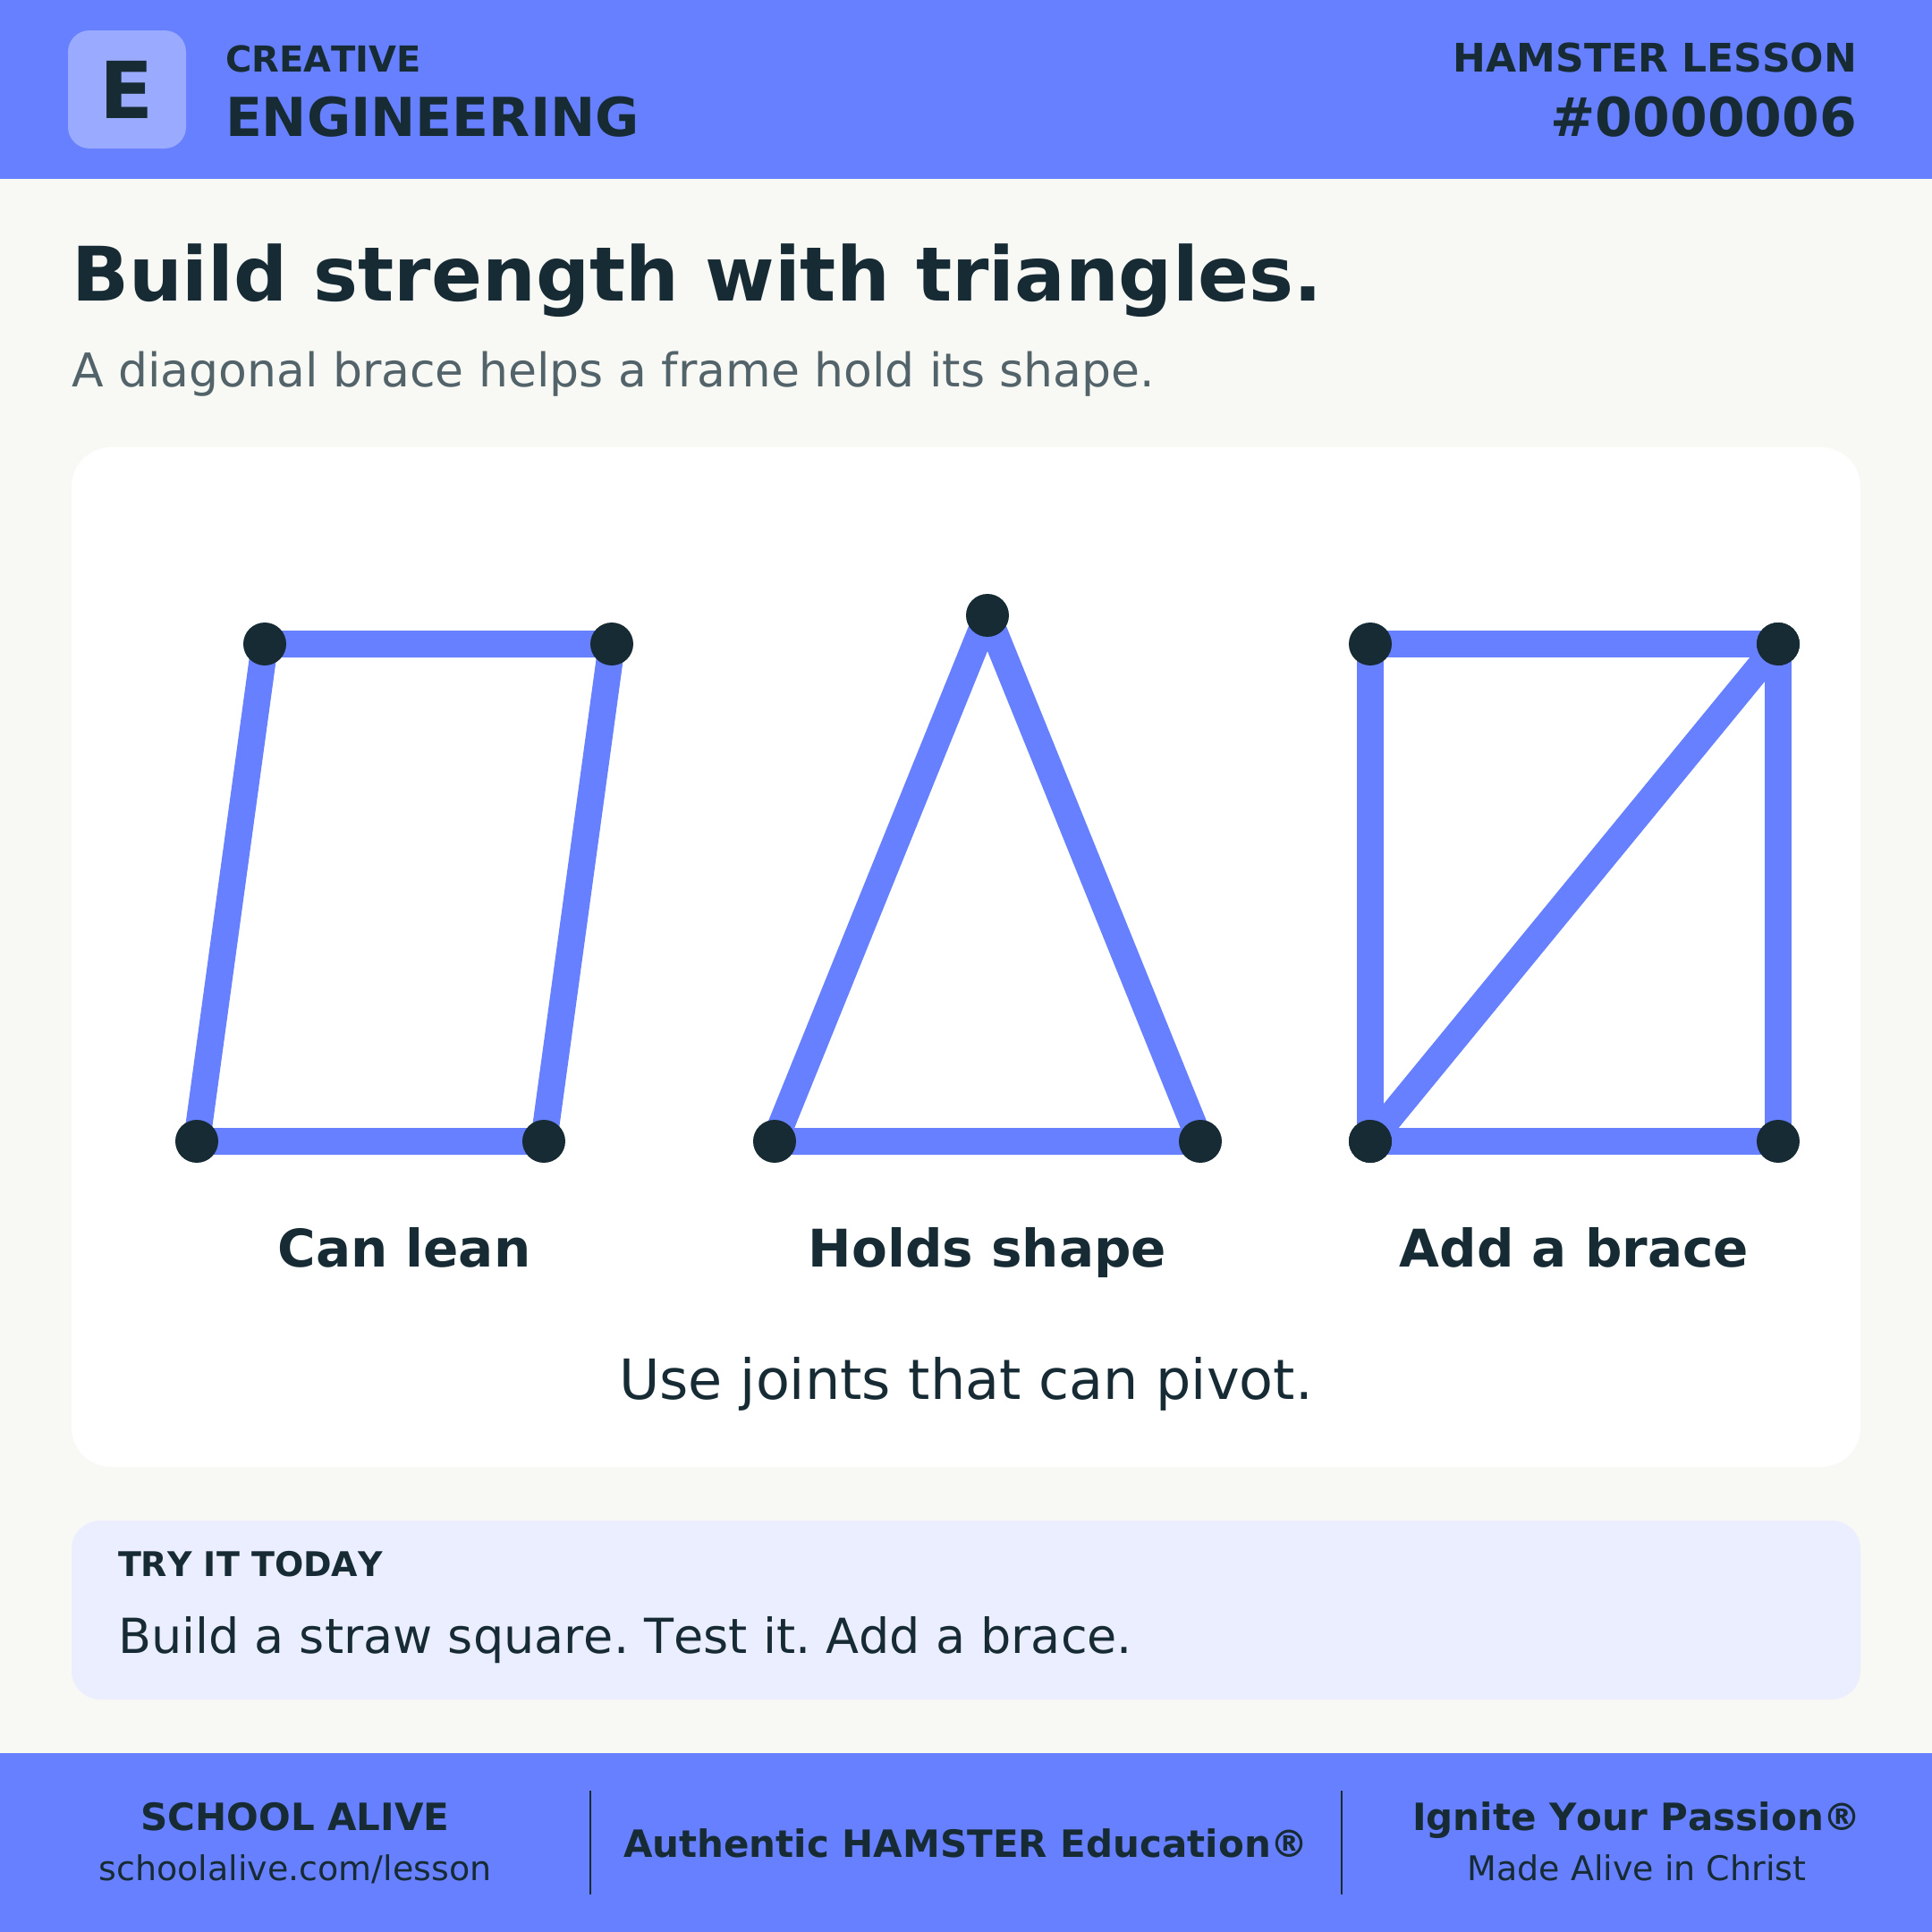
A triangle made from rigid members holds its shape even when its joints can pivot. An unbraced four-sided frame can change shape more easily.
 A triangle made from rigid members holds its shape even when its joints can pivot. An unbraced four-sided frame can change shape more easily.
History
The Warren truss was patented in 1848. Its repeating triangles became a familiar feature of metal bridges, putting geometry to work in structures that carry people and goods across a span.
 The Warren truss was patented in 1848. Its repeating triangles became a familiar feature of metal bridges, putting geometry to work in structures that carry people and goods across a span.
Example
Push gently on a square made from straws with flexible tape joints. It can lean into a diamond-like shape. Add a diagonal brace, and you divide the square into triangles that resist that movement.
 Push gently on a square made from straws with flexible tape joints. It can lean into a diamond-like shape. Add a diagonal brace, and you divide the square into triangles that resist that movement.
Insight
Shape is only part of good engineering. Materials, joints, loads, and supports also matter. Adding a triangle does not make every structure equally strong or safe.
 Shape is only part of good engineering. Materials, joints, loads, and supports also matter. Adding a triangle does not make every structure equally strong or safe.
Connection
Engineers use these ideas to design useful structures under real limits. A successful design must meet a need while respecting constraints such as cost, available materials, and safety.
 Engineers use these ideas to design useful structures under real limits. A successful design must meet a need while respecting constraints such as cost, available materials, and safety.
Challenge
Build a square with four equal short straw pieces and flexible tape joints. Predict how it will move under a gentle push, then test it. Add a longer diagonal brace and repeat a similar push. Your goal: less sideways movement. What improved? What would you change next?
 Build a square with four equal short straw pieces and flexible tape joints. Predict how it will move under a gentle push, then test it. Add a longer diagonal brace and repeat a similar push. Your goal: less sideways movement. What improved? What would you change next?
Dive deeper
Context
A frame must resist changes of shape as well as support weight. Engineers choose shapes, materials, and connections together to meet a purpose within limits.
Understand the idea
With fixed side lengths and pivoting joints, a triangle cannot change its angles without changing a side length. A four-sided frame can lean while keeping the same side lengths. A diagonal brace divides that frame into triangles and limits the movement.
That geometric advantage does not guarantee a safe structure. A thin member may bend, a joint may slip, or a support may move. Testing helps identify the weak part so the next design improves the actual problem.
Try one design improvement
- Make two matching tabletop square frames from straws and tape. Add a diagonal brace to one.
- Apply a similar gentle sideways push to each. Observe the shape and joints; use only small craft models.
- Improve one weak point while keeping the same basic materials. Repeat the comparison and explain what changed.
Discuss together
- Did the shape change, did a member bend, or did a joint slip? Why does that distinction matter?
- How would you decide whether an improvement is worth its extra material?
Introducing Microlessons
One idea. Seven steps. A practical discovery.
Begin with a question and a clear answer. Explore the history, an example, and a deeper insight. Connect the idea to everyday life, then put it into practice.
Read on your own or talk it through together. Each prepared edition includes a shareable image, concise text, and a one-page PDF.
How the 7 steps work
Each lesson moves from curiosity to understanding to practical action. Here is what each step contributes.
Question
Opens a question worth exploring and gives the lesson a clear purpose.
Answer
Gives a clear starting point that the rest of the lesson helps us understand.
History
Shows how people encountered the idea and how their discoveries shaped what we know.
Example
Makes the idea concrete through a situation, demonstration, or worked example.
Insight
Draws out the deeper principle so we understand why the idea matters.
Connection
Connects the idea to other disciplines, our faith, and everyday life.
Challenge
Turns understanding into action through something to try, practice, or explain.