
Lesson
Discover what vibrates.
SCurious ScienceIdentify a vibrating sound source and distinguish pitch from loudness.
Vibration · Motion can produce sound.
Question
What moves when you hear a sound?
 What moves when you hear a sound?
Answer
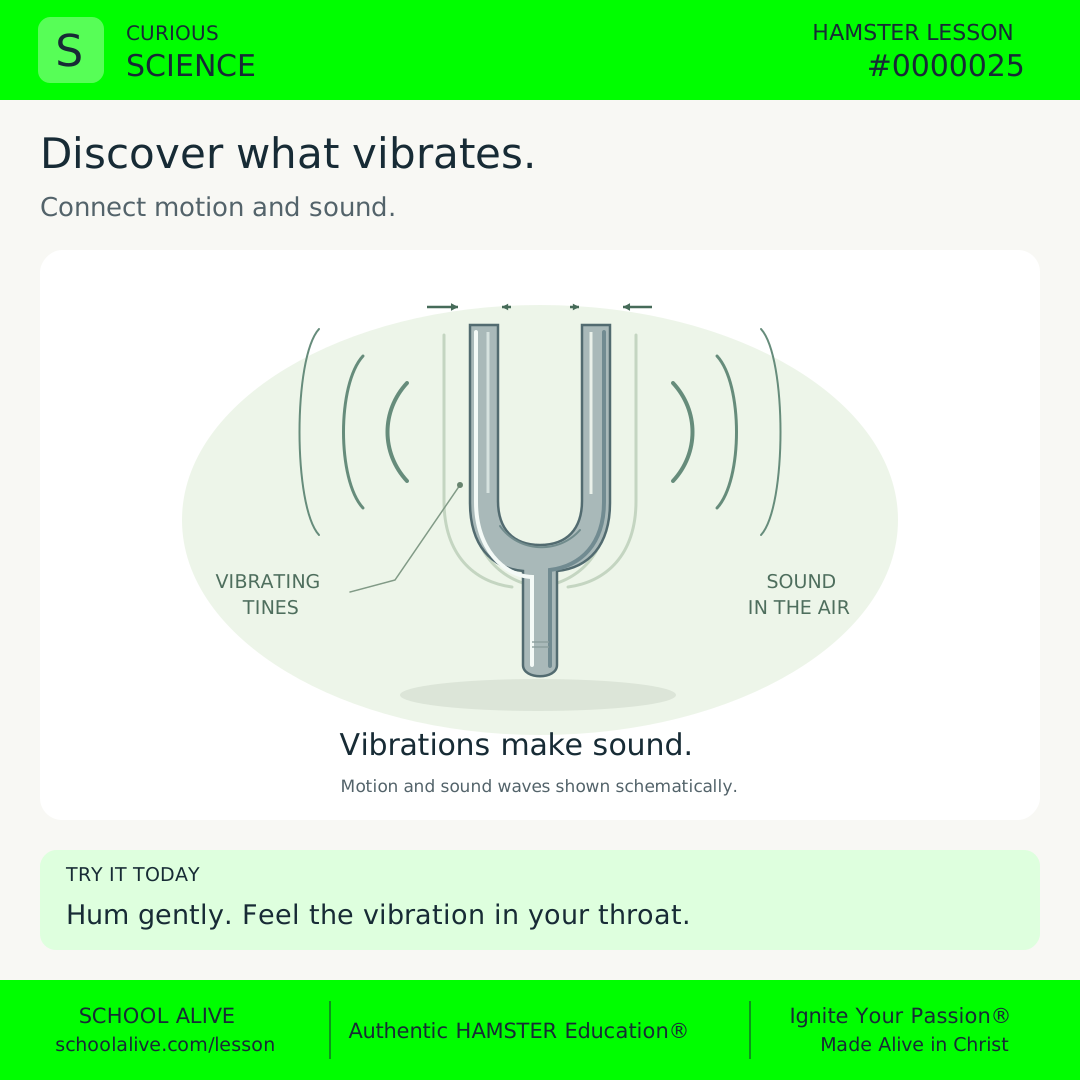
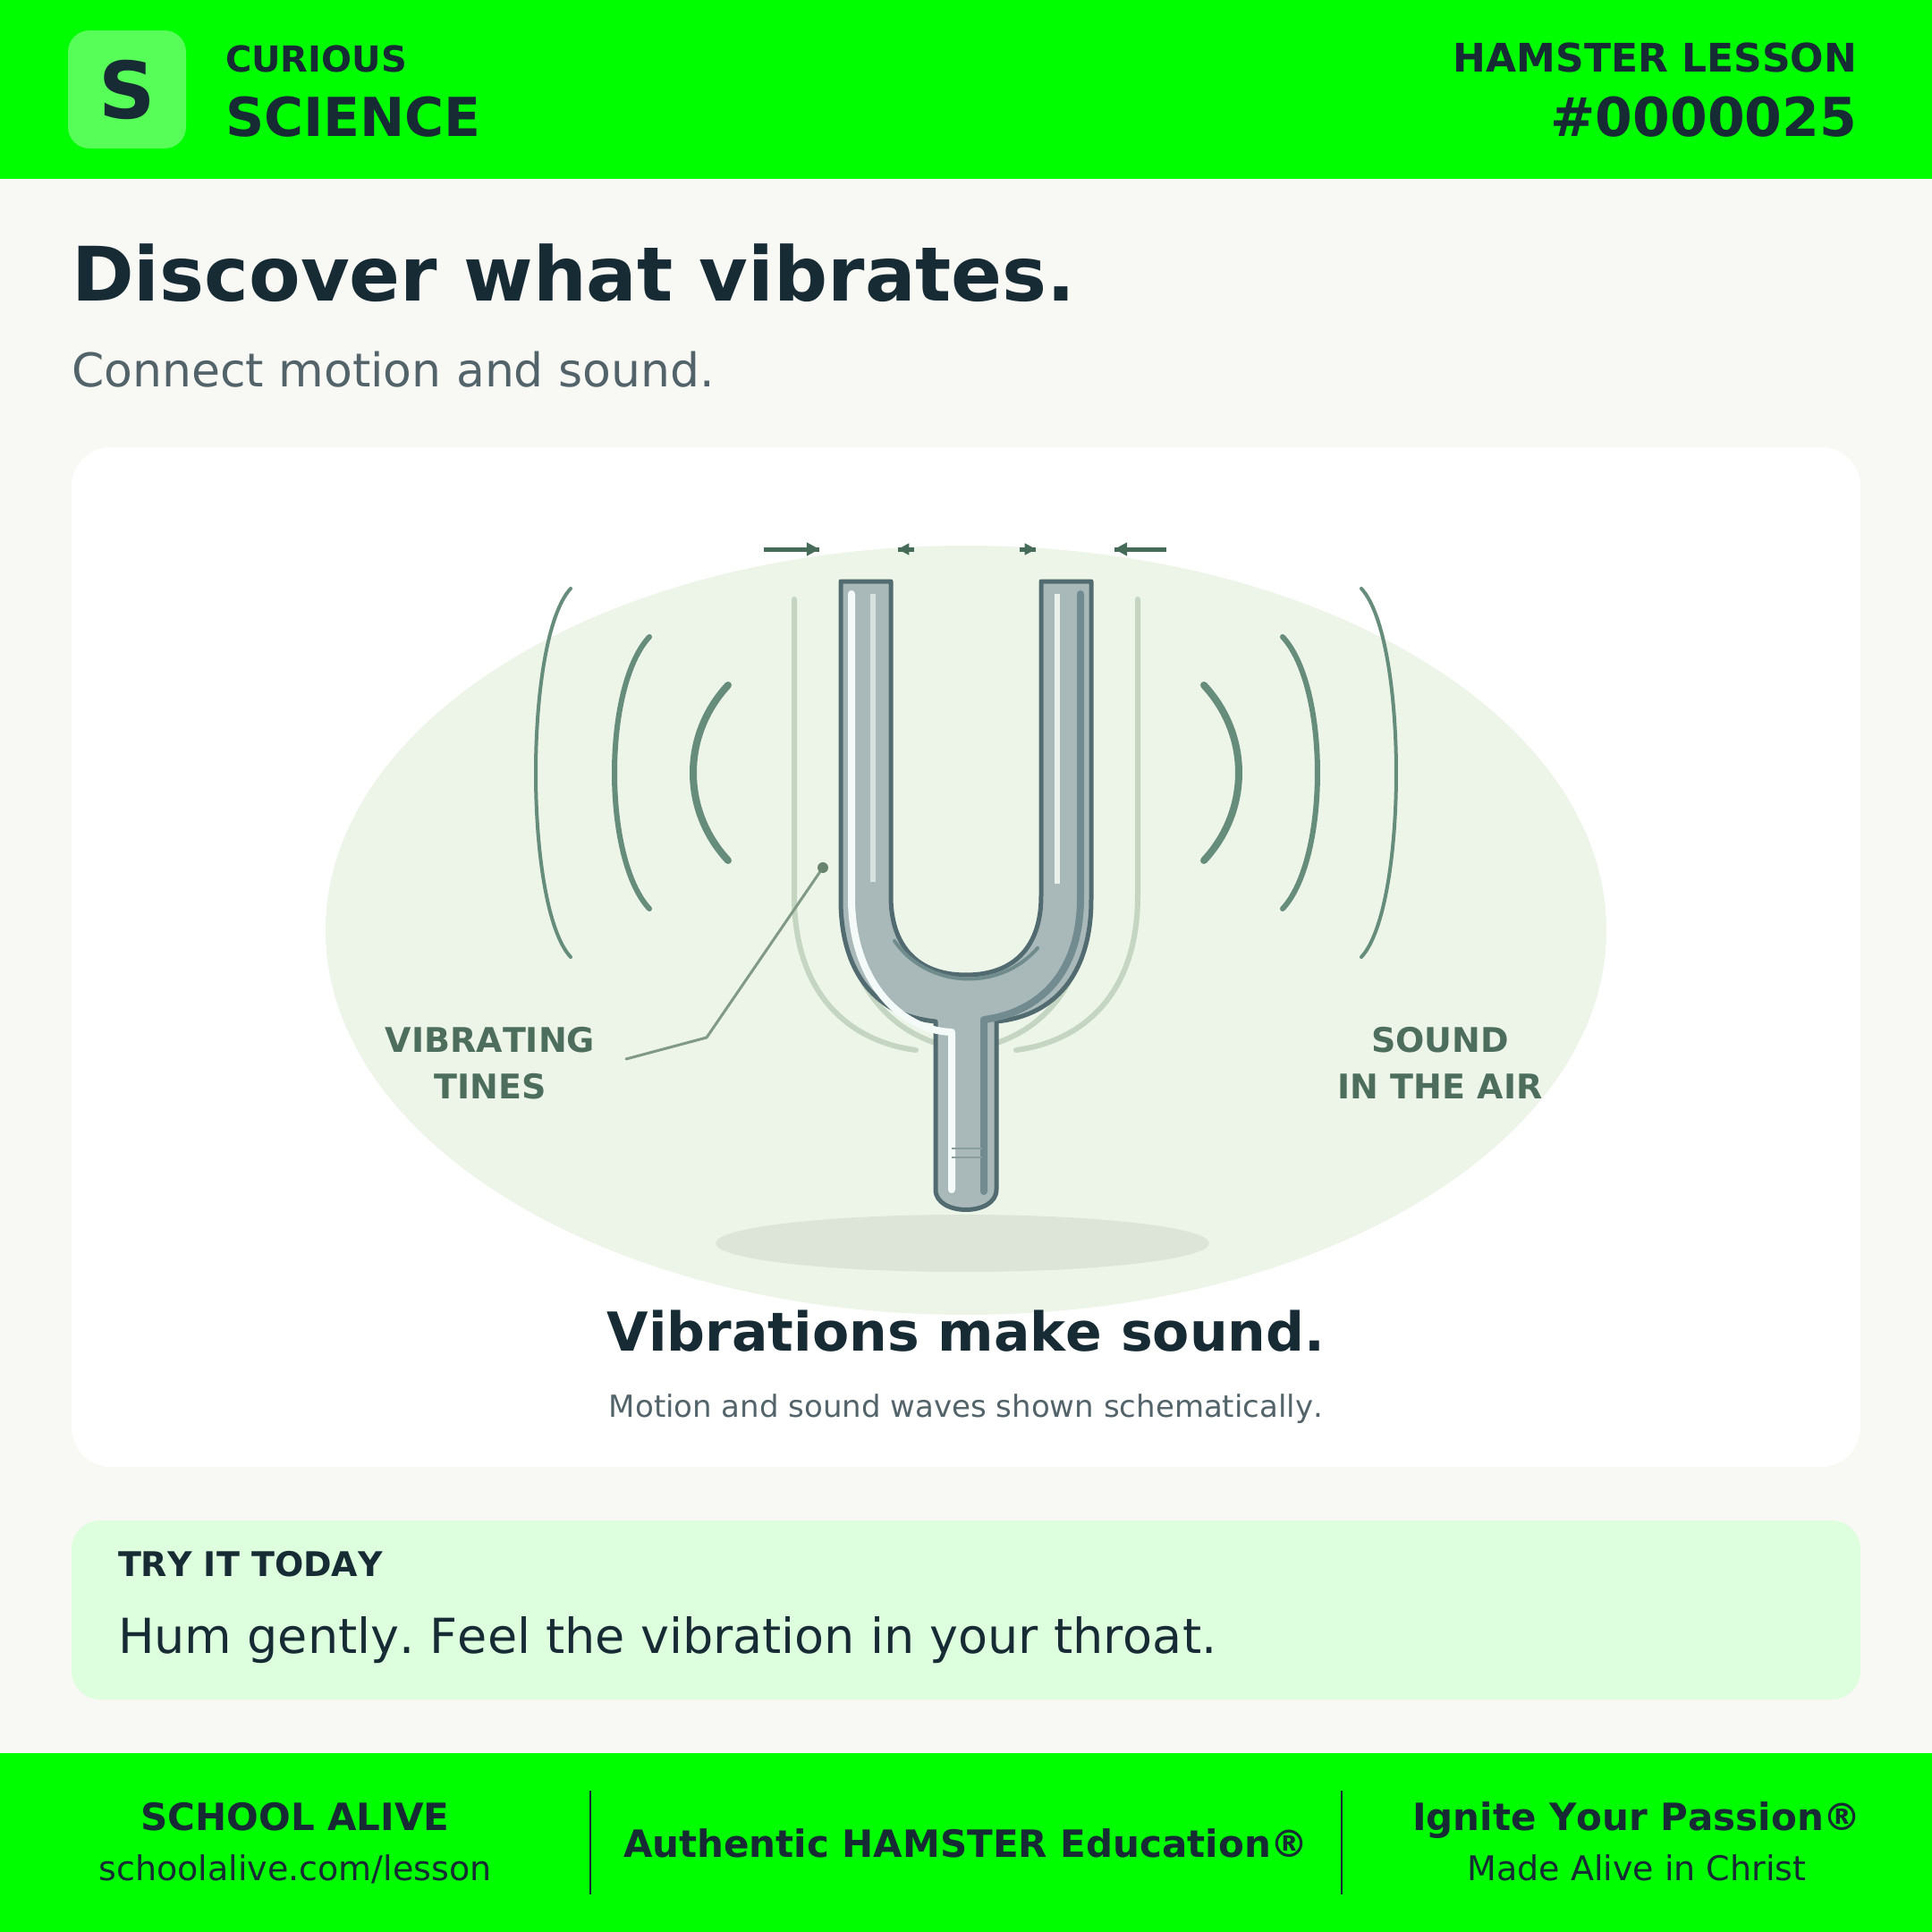
A sound source vibrates: it moves back and forth. These vibrations can make nearby air vibrate, carrying sound to your ears.
 A sound source vibrates: it moves back and forth. These vibrations can make nearby air vibrate, carrying sound to your ears.
History
The invention of the tuning fork is generally credited to musician John Shore in 1711. Its vibrating metal prongs produce a steady tone that musicians can use as a reference.
 The invention of the tuning fork is generally credited to musician John Shore in 1711. Its vibrating metal prongs produce a steady tone that musicians can use as a reference.
Example
Hum gently and lightly touch the front of your throat. Notice the vibration while you hum and how it stops when you stop. Your vocal folds vibrate to produce your voice.
 Hum gently and lightly touch the front of your throat. Notice the vibration while you hum and how it stops when you stop. Your vocal folds vibrate to produce your voice.
Insight
Faster vibrations usually mean a higher pitch; larger vibrations usually make a louder sound. Pitch and loudness describe different qualities. A high note can be quiet.
 Faster vibrations usually mean a higher pitch; larger vibrations usually make a louder sound. Pitch and loudness describe different qualities. A high note can be quiet.
Connection
A guitar string, a drumhead, and the cone of a loudspeaker all vibrate. Studying their motion helps explain the music and speech we hear in God’s orderly creation.
 A guitar string, a drumhead, and the cone of a loudspeaker all vibrate. Studying their motion helps explain the music and speech we hear in God’s orderly creation.
Challenge
Compare a low hum with a higher hum at a comfortable volume. Feel the vibration gently at your throat, then listen to a quiet sound nearby and identify what is vibrating. Explain how sound reaches your ears.
 Compare a low hum with a higher hum at a comfortable volume. Feel the vibration gently at your throat, then listen to a quiet sound nearby and identify what is vibrating. Explain how sound reaches your ears.
Dive deeper
Context
We often notice a sound before we notice its source. A voice seems to come from a person, but a closer explanation begins with vibrating vocal folds and air. Looking for the moving part helps turn a familiar experience into an investigation.
Understand the idea
A vibration is a repeated back-and-forth motion. When an object such as a tuning fork vibrates, it pushes and pulls on nearby air. Regions of higher and lower air pressure spread outward as sound waves. The air particles move back and forth around their positions; they do not travel all the way from the instrument to your ear. The curved lines in our picture are a diagram, not visible lines floating in the air.
Sound waves reaching your ear make the eardrum vibrate. Tiny bones transmit that motion to the inner ear, where specialized cells help turn it into signals the brain can interpret. Sound also travels through liquids and solids. It needs a material medium: ordinary sound cannot travel through an empty vacuum. We can investigate sound by watching a vibrating object, listening at a comfortable level, or feeling gentle vibration.
Frequency is the number of vibrations each second. A higher frequency is generally heard as a higher pitch. Amplitude describes the size of a vibration, and larger amplitude generally produces greater loudness. These properties can change independently. Try humming a high note softly, then a lower note softly. Both can be quiet even though their pitches differ. Avoid forcing your voice or making loud sounds close to anyone’s ears.
Find the moving part
- Hum gently at a comfortable pitch. Lightly rest your fingertips on the front of your throat without pressing. Compare what you feel while humming and while silent.
- Try a slightly higher and then a lower hum at the same comfortable volume. Describe the pitch using high and low rather than loud and quiet.
- Choose a nearby sound source, such as a plucked guitar string or a gently tapped drum. Identify the vibrating part without touching moving machinery or opening electrical equipment.
- Draw the source, the air, and an ear. Use labels to explain that vibration creates sound waves and that the waves make the eardrum vibrate. Older learners can add frequency and amplitude.
Discuss together
- Why might a vibration be hard to see even when we can hear its sound?
- How could you demonstrate that a higher pitch is not necessarily a louder sound?
Introducing Microlessons
One idea. Seven steps. A practical discovery.
Begin with a question and a clear answer. Explore the history, an example, and a deeper insight. Connect the idea to everyday life, then put it into practice.
Read on your own or talk it through together. Each prepared edition includes a shareable image, concise text, and a one-page PDF.
How the 7 steps work
Each lesson moves from curiosity to understanding to practical action. Here is what each step contributes.
Question
Opens a question worth exploring and gives the lesson a clear purpose.
Answer
Gives a clear starting point that the rest of the lesson helps us understand.
History
Shows how people encountered the idea and how their discoveries shaped what we know.
Example
Makes the idea concrete through a situation, demonstration, or worked example.
Insight
Draws out the deeper principle so we understand why the idea matters.
Connection
Connects the idea to other disciplines, our faith, and everyday life.
Challenge
Turns understanding into action through something to try, practice, or explain.